
Well, In this tutorial, I am going to guide you how to create a blog for free on WordPress with a custom domain name using Hostinger free web hosting with a free custom domain name. In the previous article I have discussed How to Create And Start A Blog For free on blogger, now I will explain how to install the world’s most popular CMS (content management system) Wordpress on a Self-hosted Web Hosting.
So Let’s install WordPress and create a blog or website on a self-hosted web hosting with a custom domain name.
You Need:
- Domain name
- Hostinger Web Hosting
Table of Contents
How To Get a Free Domain name?
Before creating WordPress blog, you need a domain name. For domain name you have three choices:
- Premium domain ( dot.Com, Dot.Net) Not Free
- Free domain name ( Dot.Tk, dot.Co.Cc )
- Sub-domain name ( name.hostinger.com) It’s Free
For the premium domain name, you need to pay some money but if you want completely free Blog/website then, In my opinion, a Free domain name is a better choice.
You can get a free domain name from Top Free Domain Name services Providers. The free domain name should look like www.example.tk. So If you are chosen a domain name, then we can go for next step.
Install and setup Wordpress on Hostinger
So Before Install WordPress, You have to connect the domain to the hosting by changing Domain Name Server. It is very easy.
Just Login your domain Panel and Go to My Domain > Management Tools>Nameserver > Select Use Custom Name Server and Add these following NameServer or change old Name Server to hostinger NameServer:
ns1.hostinger.in
ns2.hostinger.in
ns3.hostinger.in
ns4.hostinger.in
After changing Nameserver, you have to wait for approximately 2-6 hours, or sometimes it will take more time for update name server. Don’t worry It will automatically finish for your new domain. Now domain setting is completed.
So, Let’s Set Up Hosting for install WordPress. Now you need to register on hostinger free web hosting. Visit here: Hostinger Free Web Hosting. You can directly login with your Facebook or Gmail account manually.
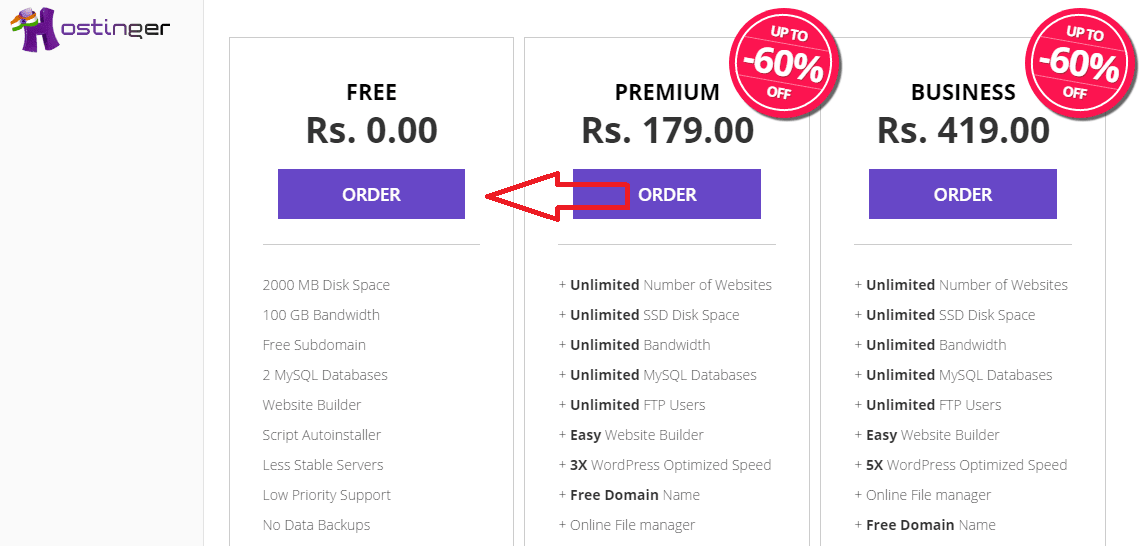
- After registration, you have to order free web hosting package. So click Order you see below image:
- On the next Order, page click checks out Now and again the following tick on I agree with and click Complete Order.
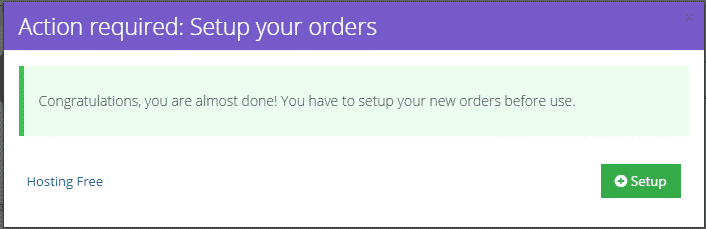
- Now You need to setup your hosting. After completing your order, a pop-up Setup page will Open Just click on Setup Page:
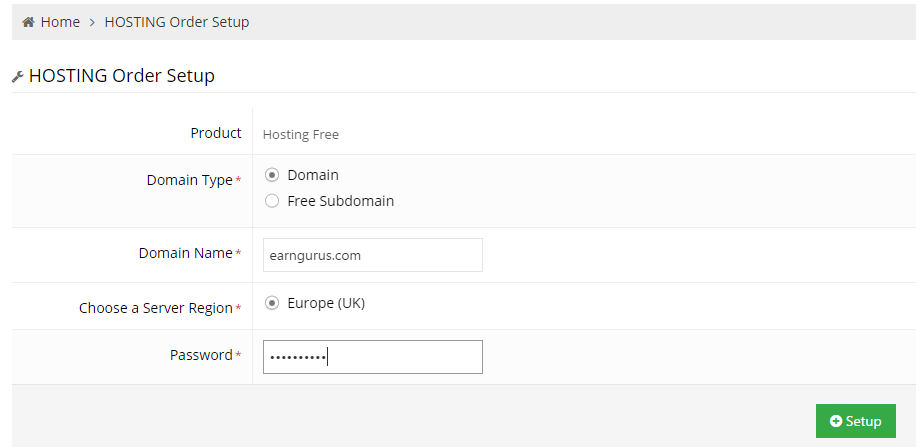
- Add your domain name, or If you still don’t have register your domain name, then you can select sub-domain name.

- Now Click Setup. Now you’re hosting ready.
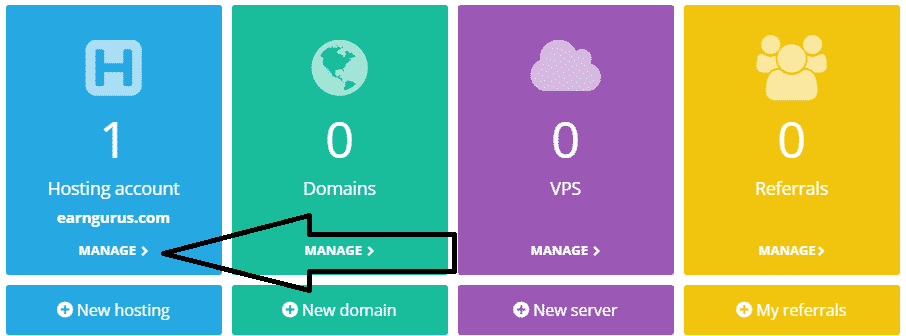
- Now you can see your hosting Manage panel. Click on Hosting Account manage
- Next, you will be redirected to main Control Panel. There, you will have all the necessary control on your hosting. You can install WordPress from your Control Panel. But Auto Wordpress installer is only for Premium user, But We can install with other methods So lets Start.
Read More: Top 10 Best Free Web Hosting Providers
Install Wordpress With FileZilla
On Hostinger we can’t access file manager directly, so we need to install FileZilla for access file manager. Just download Filezilla from here: Download Filezilla
Now you need to file manager access details; you can find the details on hostinger file manager 2. Just visit hostinger Control Panel > Click File Manager 2.
On File Manager 2, you can see FTP access details Like:
FTP Hostname: ftp.techpanga.com
FTP Username: u37712#####
FTP Password: Change Account Password
FTP Port: 21
If you don’t know the password, then change your FTP Password. Now open FileZilla and enter the details Host ( host name), username(FTP Username) Password ( FTP Password ) and port 21 and hit enter Quick Connect.
After Login on FileZilla, You can see two old directories Default.php and .htaccess. Just delete all of them.
Next, We have to download and upload Wordpress file on FileZilla. So Download WordPress here: Wordpress. Now Extract all Wordpress file on the desktop. Open WordPress folder in your FileZilla client and upload all files from it to the hosting account. It will take some time. So Please be Patient
→Create MySQL Database
Now, we need to create MySQL Database.
WordPress generates all information is stored in the database. Thus, you’ll need to create one.
You can create a MySQL database on Hostinger control panel –> Databases >MySQL Databases >Now enter>
MySQL database name
MySQL username
Password
And Click create, Now your database is ready. Now time to set up Wordpress.
→Wordpress Installation Wizard
After all Opening your domain name with a web browser. WordPress 5-minute installation wizard has six steps in total:
- Select your language and press Continue.
- WordPress will ask to collect MySQL details. Since you already have them, press Let’s go! button.
- On the next page, you need to enter your database details you can find all the details Hostinger control panel –> Databases > MySQL Databases. So enter Database Name, UserName, database host, Password and click Submit.
- WordPress will check whether it’s possible to connect to MySQL database. If there are no errors, press Run the install.
- At this step, you need to enter all these details
- Site Title – Your web site title.
- Username – Administrator username.
- Password – Administrator password.
- Your Email – Administrator email address.
- Search Engine Visibility – If you check this option, WordPress will try to prevent search engines from crawling your website.
- That’s it, WordPress installation has been completed. Press Login button to access the WP admin area.
How To Open Wordpress DashBoard To Post Articles?
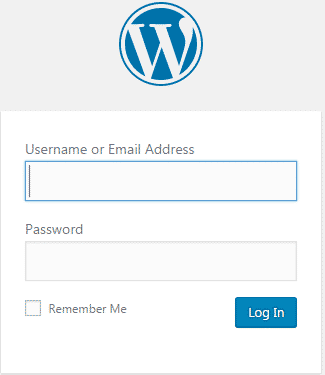
Top Open DashBoard goes to > www.domain.com/wp-admin. So just log in with your username and password and click Login.
After login, you will be redirected to Wordpress dashboard. There you can post articles, install plugins, change WordPress and lots more can do.
So Your Wordpress Blog is ready. If you Like, please share this article with your friends.
Graet info on free hosting. Its good for beginer bloggers. Very nice info in details. Thank you.
Good blog here! Furthermore your blog a whole lot right up very quick! What sponsor have you been using? Can I was taking your . dgu hostingaffiliate marketer url on the variety? I wish my own web page loaded up as rapid while the one you have haha