
I have been using Cloud Hosting or VPS services from Digital Ocean for last two months. Before using cloud hosting, I used shared hosting.
The reason for leaving shared hosting because I have experienced a very slow and even server down a problem on Shared Hosting. So I moved my blog from shared hosting to Digital Ocean One of the best cloud hosting.
The reason for leaving shared hosting because I have experienced a very slow and even server down a problem on Shared Hosting. So I moved my blog from shared hosting to Digital Ocean One of the best cloud hosting.
I thought of using dedicated host at the beginning. But it is costly. Shared hosting is not only cheap but also its quality is inferior.
According to the cost of VPS, its quality is better than shared hosting. So I prefer using VPS.
So In this post, I want to share a little tutorial on how to install WordPress on Digital Ocean special for my friend who might be interested also I am using cloud hosting services from Digital Ocean.
Read More:
- How To Get Free VPS On Digital Ocean Without Credit Card
- Top Free SSL Certificate Providers Trusted By Most Browsers
What is Digital Ocean?
Before I proceed to the tutorial on how to install WordPress, it helps us find out first what is your Digital Ocean and more importantly what is Cloud Hosting.
The first thing you need to know, Hosting. Digital Ocean is a different hosting service with hosting services in general.
Digital Ocean is not the same as HostGator, Hawkhost, Bluehost, and others. Digital Ocean is Cloud Hosting services. Or perhaps more precisely hosting.
Virtualization. If according to some articles I read on the internet, cloud hosting was almost like VPS, both virtualization. Just how it works is not the same.
How to Install WordPress On Digital Ocean?
Things that are needed:
- Computer or laptop
- Digital Ocean account ( How To Get Free $25 DigitalOcean Coupon Code? )
- PuTTY to access the server software ( download here )
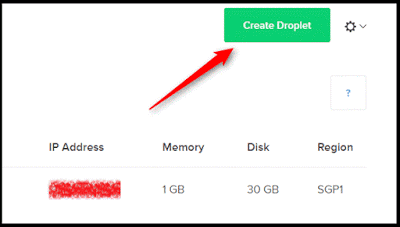
1. Login your account or create a new account on digitalOcean, then click ” Create Droplet ” (droplet mean VPS)
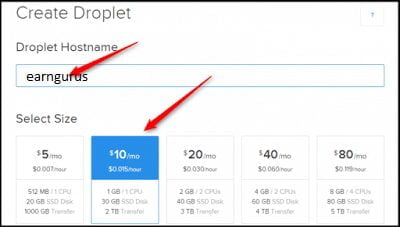
2. In the Hostname enter just the domain name or the name of your blog. And in the Select Size choose $ 10 or any (for the experiment you can select $ 5 first).
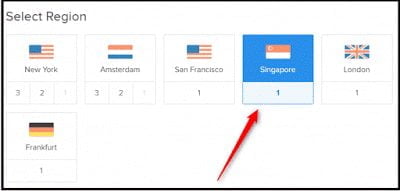
3. On the Select Region, select a location closest to the target visitors of your blog, or you can select any:
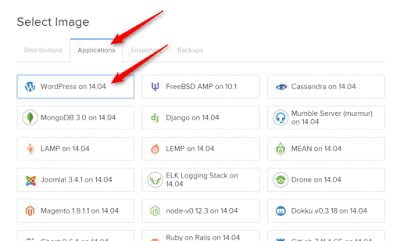
4. In the Select Image, click the Applications tab and select WordPress on 14:04.
5. click on “Create Droplet ” at the bottom. It will take 30 seconds to create VPS.When the process is complete
6. When the process is completed, you will receive root login details. Next, you need to log in and change VPS password by the putty.
After that in the email, you can see an IP address Like (188.208.141.121), Just copy the IP and paste it in your browser URL bar and hit enter.
On the page, you can see WordPress installing and setup page opened.There, you need to enter your site title, username name, password, email. And click initialising WordPresss.
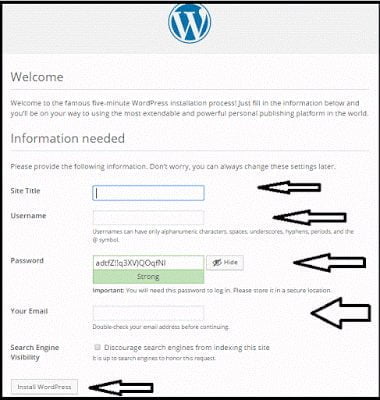
7. After WordPress installed, your WordPress blog will ready.
How to connect a domain name to Digital Ocean?
Now you need to connect your domain name to the digital ocean. Otherwise, the blog can only access the IP address. Therefore you need to connect the domain name to Digital Ocean.
1. Go to your Domain Control Panel, add custom nameserver or add new digital ocean NS:
- ns1.digitalocean.com.
- ns2.digitalocean.com.
- ns3.digitalocean.com.
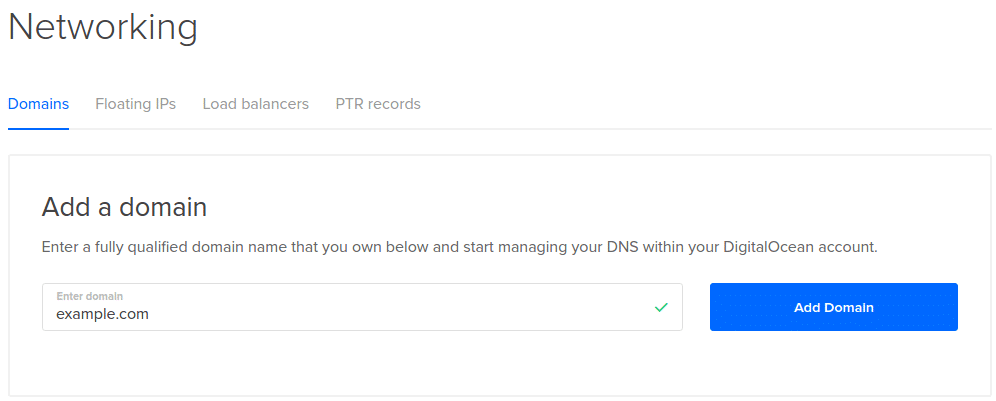
2. Next, You need to add your domain name on Digital Ocean. Go to your DigitalOcean account, select Add a Domain.
3. Add DigitalOcean domain servers as shown in the following picture.
PHP.ini Configuration for running WordPress smoothly
Most fancy theme and plugin requires high-end configuration to run. Therefore, we should make these changes.
Edit php.ini file
sudo nano /etc/php/7.2/fpm/php.ini
Use CTRL+W to quickly Find parameter in SSH and make changes as suggested below.
max_execution_time
Change 30 to 300
max_input_time
Change 60 to 600
memory_limit
Change to 128M to 256M
post_max_size
Change 8M to 64M
upload_max_filesize
Change 2M to 32M
After this, please reload both the PHP-fpm and nginx services.
Done! Type your domain in the URL address of a web browser to check. That’s a full tutorial simple way to install WordPress in Digital Ocean. If you have any problem or question, then comment here to discuss.


Hi Manoj, thanks for this tutorial. This seems good for newly install sites but how about moving your blog from other hosting to digital ocean? I’m thinking to try Digital Ocean in the future.
Thanks,