Root Xiaomi with Magisk Without TWRP – Perform root on the Android smartphone is one way we can be free to modify Android.
Because if the smartphone does not have root access, then all of our access will be restricted. In this tutorial, I will share how to root easily and safely so that users can still get operating system updates via OTA (Over The Air).
The usual tutorials that we often encounter to root on Xiaomi phones are required to use custom recovery like the TWRP (Team Win Recovery Project). But unfortunately, if we use custom recovery, we will no longer get an operating system update.
In this tutorial, I will share how to root using Magisk. What are the benefits of using Magisk instead of SuperSU?
| Benefits Of Magisk |
|---|
| 1. Magisk works Systemless |
| 2. Can hide root status |
| 3. Can update the operating system via OTA |
| 4. Bypass SafetyNet |
| 5. and so forth |
Systemless, meaning Magisk will not change the system partition on Android, unlike SuperSU where the system partition on your smartphone is changed.
So that if you root using Magisk it can safely hide your root status, so you can install applications that prohibit from being rooted, for example, banking applications. Besides that, you can get an OS (Operation System) update via OTA, bypassing the Safety net. and so forth.
Read More: Best Sites To Download Cracked Android apps
Here’s how to easily root all types of Xiaomi Android using Magisk:
Equipment needed:
- All types of Xiaomi Android ( Mi a1, Redmi Note 4,5,6; )
- Data cable
- Laptop or PC (If you can’t get to the internet cafe or borrow a friend)
The first step is to unlock the bootloader first.
⇒1. HOW TO UNLOCK THE XIAOMI BOOTLOADER
1. Enter Settings → Mi Account, Create a Xiaomi account with an email & telephone number and associate an account.
2. Then activate the Developer Options menu, how to enter Settings-About Phone → MIUI Version, tap 7 -8 times. Until there is a message “Your now a developer!”.
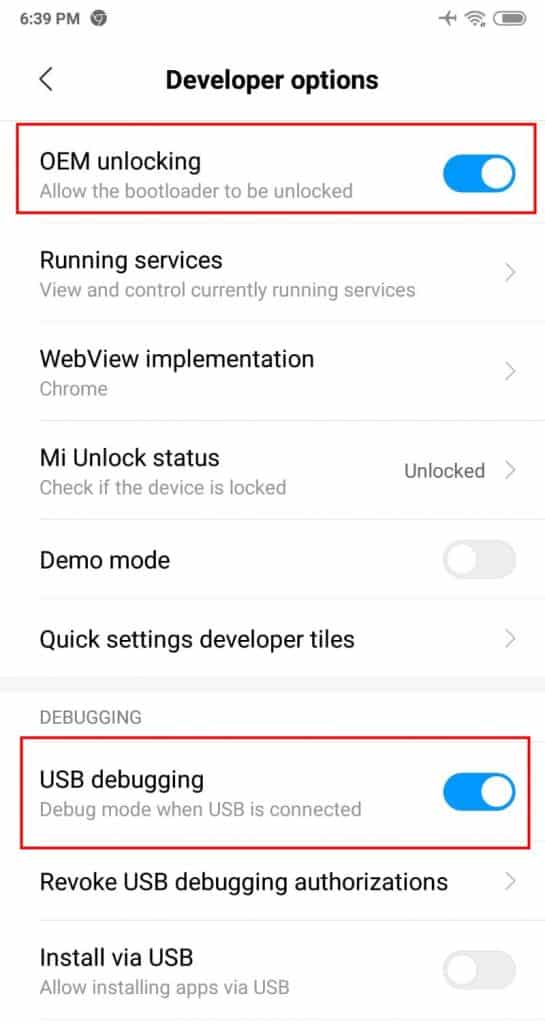
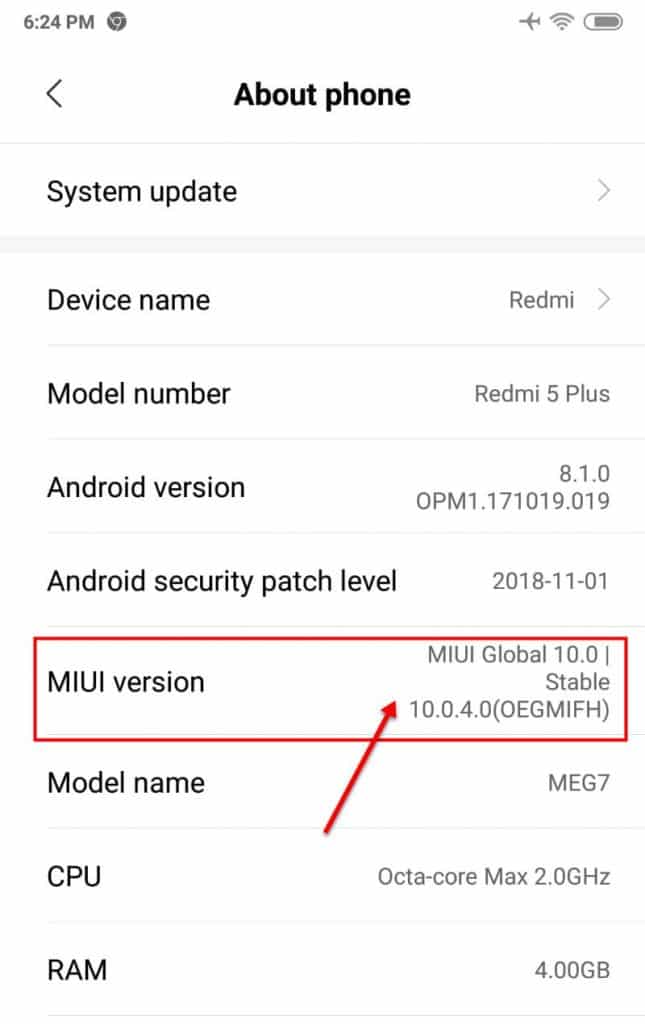 3. If it is active, then go back to Settings → Additional Settings → Developer Options → then activate the ” OEM Unlock & USB Debugging ” menu. The also check ” Mi Unlock Status “, if there is a request button or link please tap.
4. Connect your Xiaomi phone to the laptop / PC in Fastboot mode.
- How to enter Fastboot mode: Turn off the cellphone first, if it is already off then press the power button and volume down simultaneously do not remove it until you see the Fastboot logo.
5. Then download the MI Flash Unlock application and extract the Mi Flash Unlock file, then move it to the C / drive:
6. Enter the MI Flash Unlock folder, and look for the MIUSBDriver .exe file, then install.
7. Then run MIFlash_Unlock .exe and MI account login according to the account that has been linked to your Xiaomi Android, then if the unlock button cannot be clicked it means the driver is not fully installed. For that, you must also install the driver manually.
Download USB Driver, then extract. Now run Windows run, ( Windows + R ) then type devmgmt.msc
Must read: 5 Best Ad blocker for Android – Block Ads & Pop Ups
Check the Android USB driver for an exclamation mark or question mark. select and right-click, select ” Software Driver Update ” → Browse for software driver on your computer → Navigate to the USB Driver folder that you have not extracted.
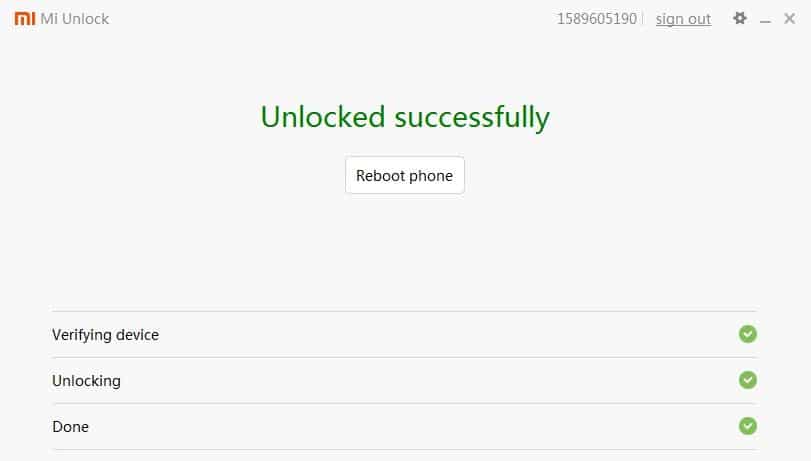
8. Next, If the unlock button can be clicked, then follow the instructions select Unlock. Later there will be a message told to wait 72 hours or 3 days. Because we have to request prior to the team Xiaomi to be verified during the 3 days.
9. If it’s been 3 days, please repeat the method again, by entering Fastboot mode again and running Mi Flash Unlock, then select Lock again. Later there will be a Successful message. If in the event of a cross and not the success, please repeat again by selecting the unlock button.
 ⇒2. How to Root Xiaomi with Magisk Without Custom Recovery
After your Xiaomi cellphone is unlocked, the next step is Root Xiaomi phone with Magisk.
1. Download the Minimal Adbfastoot Magisk Manager & Software application, boot.img.
Boot.img is obtained from Xiaomi’s official ROM Pack, each boot varies according to its Xiaomi type.
- Download Magisk Manager
- Minimal download of ADB Fastboot
- Download Boot.img (for Xiaomi Redmi 5 / Plus only)
- Download Boot.img for all types of Xiaomi
Visit the site http://en.miui.com/download.html to download the ROM pack for other Xiaomi types.
2. If the ROM Pack has been downloaded, then extract it, enter the folder and look for the file named Boot.img, then copy boot.img to your Android’s internal memory.
3. Then install the Magisk Manager application and run it, select install → Patch boot image file, then, point to boot.img on your cell phone’s internal memory, wait for the flashing boot process to finish.
After the flashing boot process is complete there will be a patched_boot.img file in the ” download ” folder.
4. Then copy the Patched_boot.img file to your Laptop / PC.
5. Then your Xiaomi cellphone enters Fastboot mode again & connects the HP to a laptop / PC with a data cable.
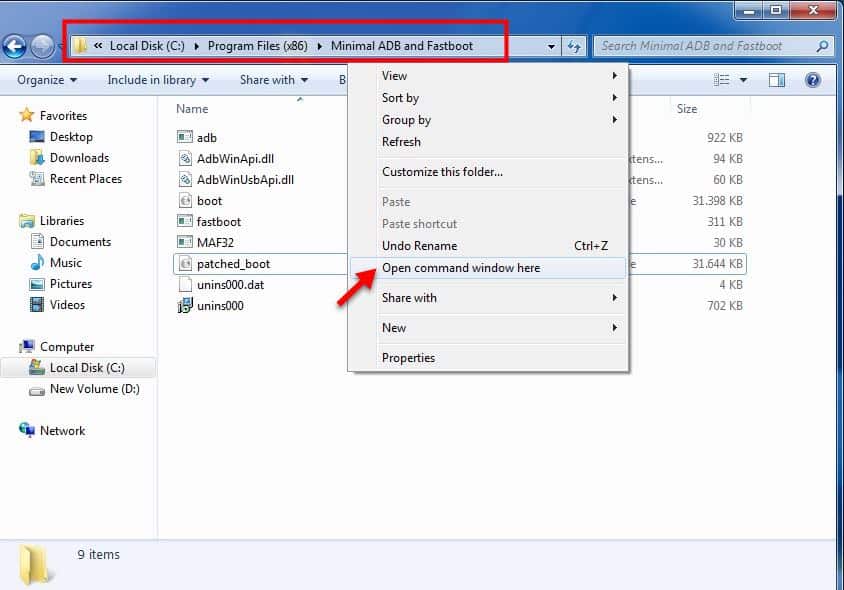
6. Next, install minimal adb fastboot software, then copy patched_boot.img into the C: \ Program Files (x86) folder \ Minimal ADB and Fastboot \
7. If you have copied the patched_boot.img file into the minimum ADB and Fastboot folder, then run the minimum ADB Fastboot software, through the Start bar or press shift + right-click in the blank space in the Minimal ADB and Fastboot folder, select Open command window here.
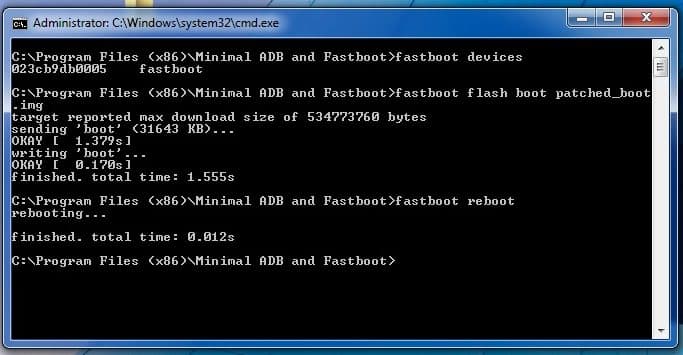
8. Next in the Minimal ADB Fastboot software, check that mobile is connected or not by typing: fastboot devices
Next type: fastboot flash boot patched_boot.img
Wait for complete and last type: fastboot reboot
Mobile will automatically restart and the last step opens the Magisk Manager application on your mobile, select SafetyNet to do a check. Congratulations on your Xioami cellphone successfully rooted! Easy isn’t it? Good luck.
Addition: You can also install the basic Root Checker application on the Play Store to check the root status or not. thanks.

