

Most video ideas die somewhere between the thought and the first shot. A concept that seems clear in your head has to become a script, then a shot list, then footage you can actually use. Each stage is a place where an idea quietly stops being worth the effort.
AI idea-to-video removes a lot of the setup that usually comes before editing. In Filmora, a rough idea can become a script and then a storyboard, which you can check before any scenes are generated. Reviewing first makes weak scenes easier to fix before the full video is generated.
Table of Contents
Part 1. What Does AI Idea to Video Mean?
The phrase covers something narrower and more specific than it first sounds. Generating a single clip usually means giving a model one description and receiving one piece of footage in return. An AI idea to video workflow treats the concept as a story instead, one that has to be divided into parts before any footage exists. The difference becomes clearer when you compare what each workflow gives you:
| Generating a Single Clip | Developing a Story |
|---|---|
| One description produces one piece of footage, complete in itself. | One concept produces a script, a cast of characters, and a sequence of scenes. |
| Nothing carries over between attempts, so every run starts from nothing. | Characters and visual style can stay more consistent from the first scene onward. |
| The result either works or it does not, and the fix is another prompt. | Individual scenes can be revised without regenerating everything around them. |
| Best for an insert, a background, or a single isolated moment. | Best when the video has to say something in an order that matters. |
Part 2. What an AI Idea-to-Video Workflow Can Include
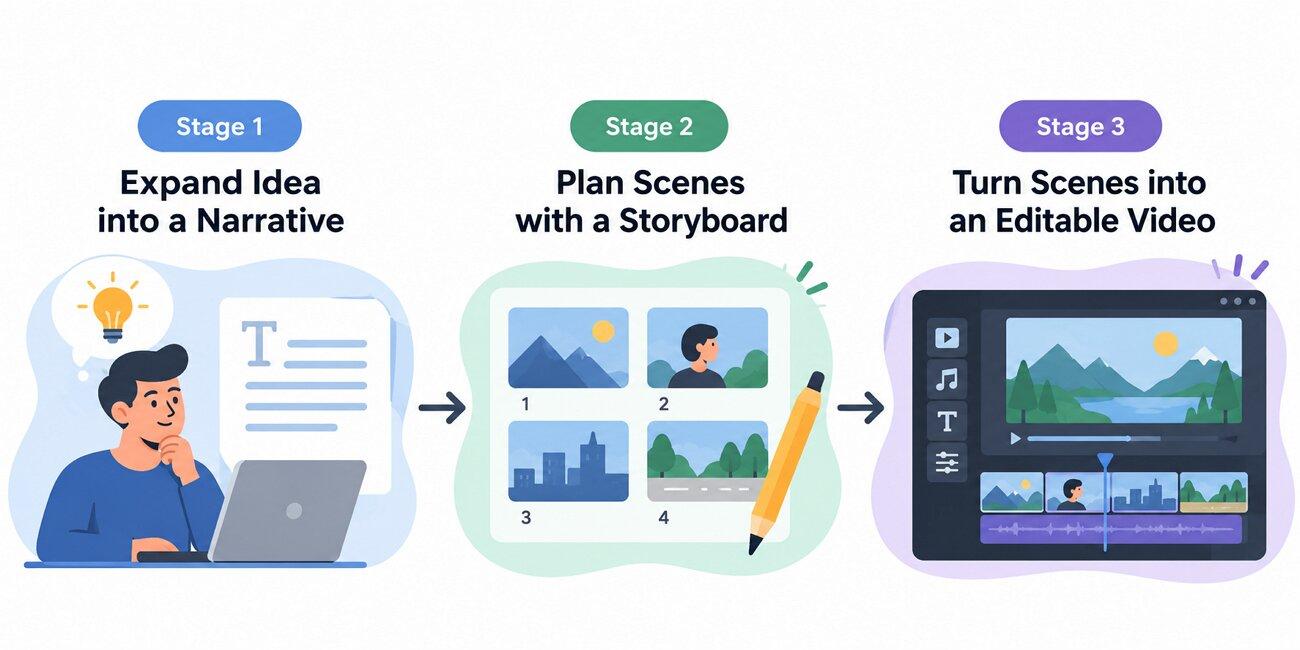
An AI idea-to-video workflow usually moves through three stages, each handling a different part of the process. The points below show what happens at each stage and what can still be changed before the video is finalized:
Stage 1. Expanding an Idea into a Narrative
The first stage takes whatever you typed and develops it into a fuller story. Wondershare says the input can range from a few keywords to a 200-word story idea. The model expands either into a structured script with characters, scenes, and a clearer narrative flow. It also identifies key characters, giving them descriptions that later scenes can follow.
Stage 2. Planning Scenes with a Storyboard
Next, the script is divided into numbered scenes, each with its own visual description and place in the sequence. At this stage, the video still exists mainly as a plan, making changes easier before generation begins.
Stage 3. Moving from Scenes to an Editable Video
Approving the storyboard starts generation, and the result does not arrive as one flat file. Filmora adds the generated scenes to the editing timeline, where the video can be refined before export.
Part 3. How to Create a Story Video with Filmora AI Idea to Video
Running those 3 stages can otherwise involve separate tools and repeated exports. Filmora keeps AI idea to video workflow in one place. There is no need to export and reimport files between the script, storyboard, and editing timeline.
Filmora supports Seedance 2.0, Sora 2, and Veo 3.1 for AI video generation, depending on the workflow and model you select. Moreover, visual style is handled separately, with options such as realistic, anime, Disney-style, and cyberpunk available for shaping the overall look of the story.
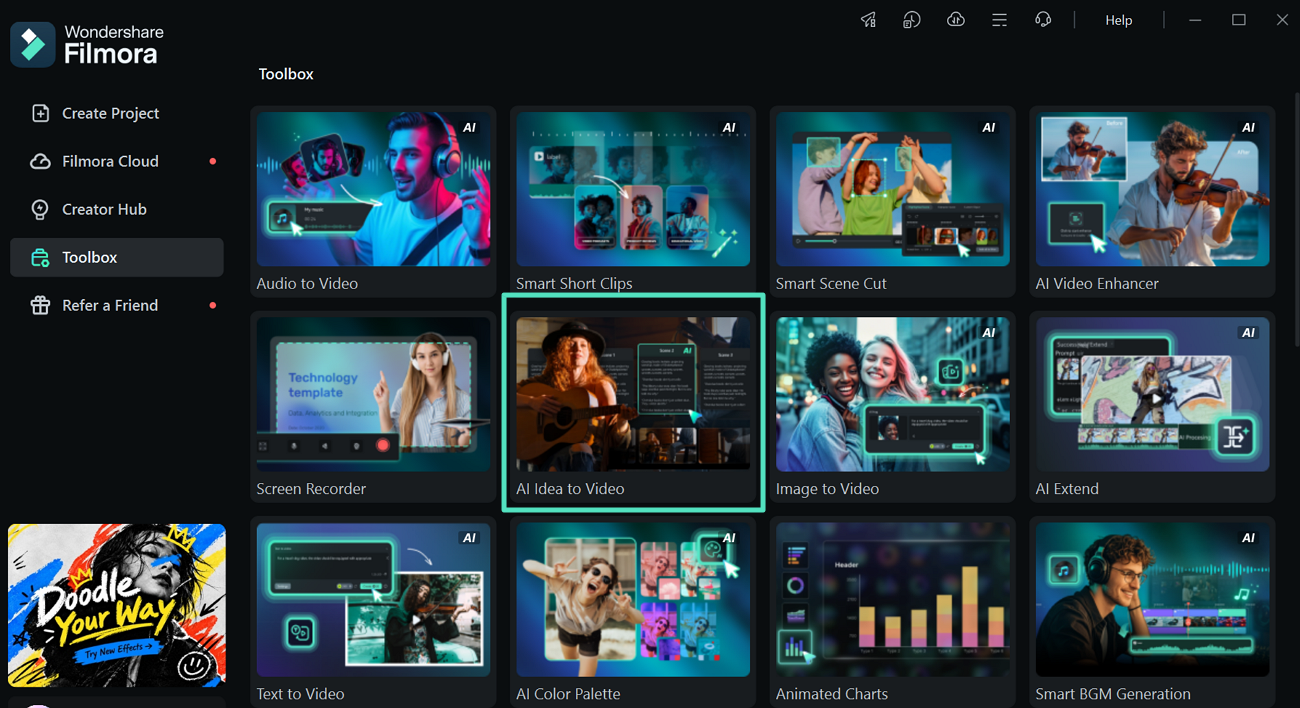
Step 1. Open AI Idea to Video
Launch Filmora, open “Toolbox,” and select “AI Idea to Video” to enter the story-generation workspace.
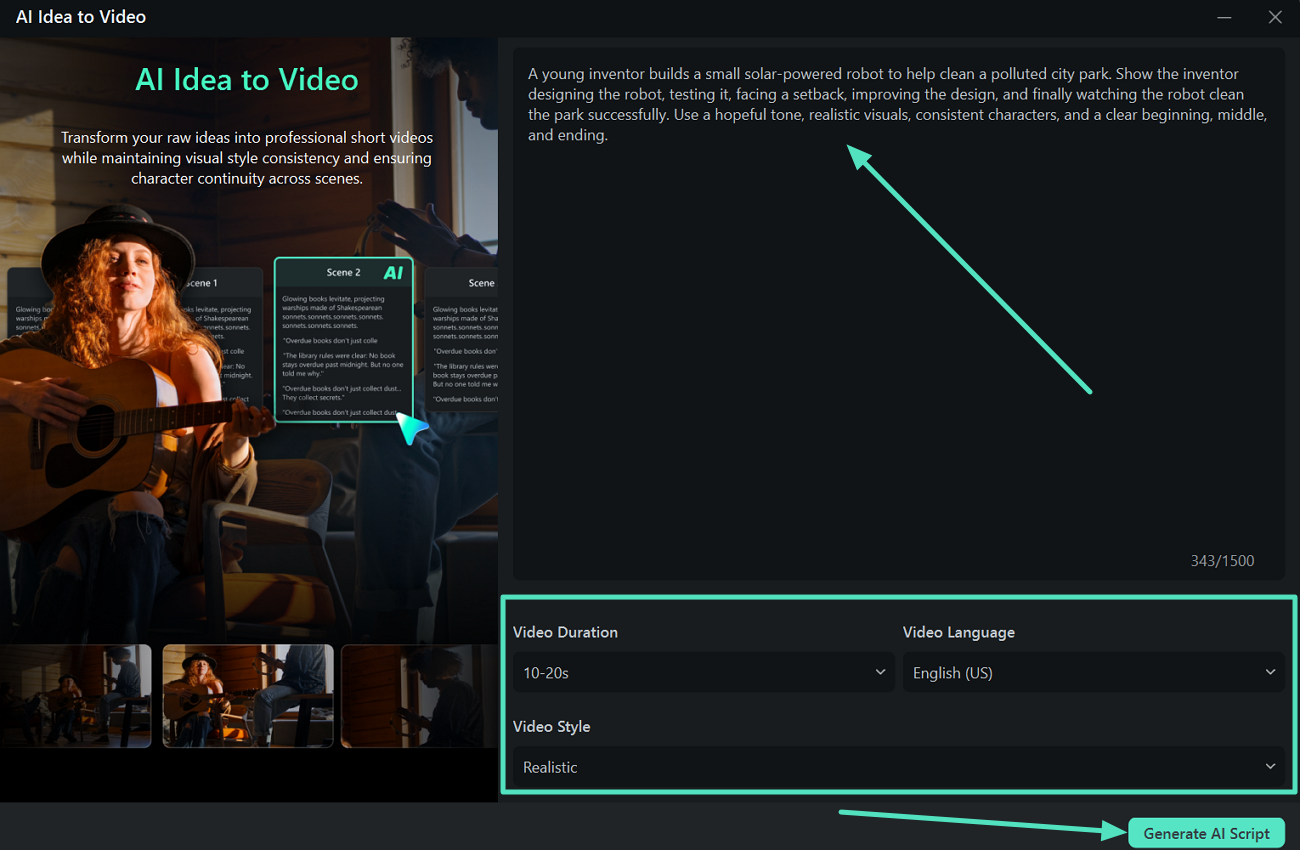
Step 2. Enter Your Story Idea
Type your concept into the prompt box. Then choose the “Video Duration,” “Video Language,” and “Video Style,” and click “Generate AI Script.”
Step 3. Review the Generated Script
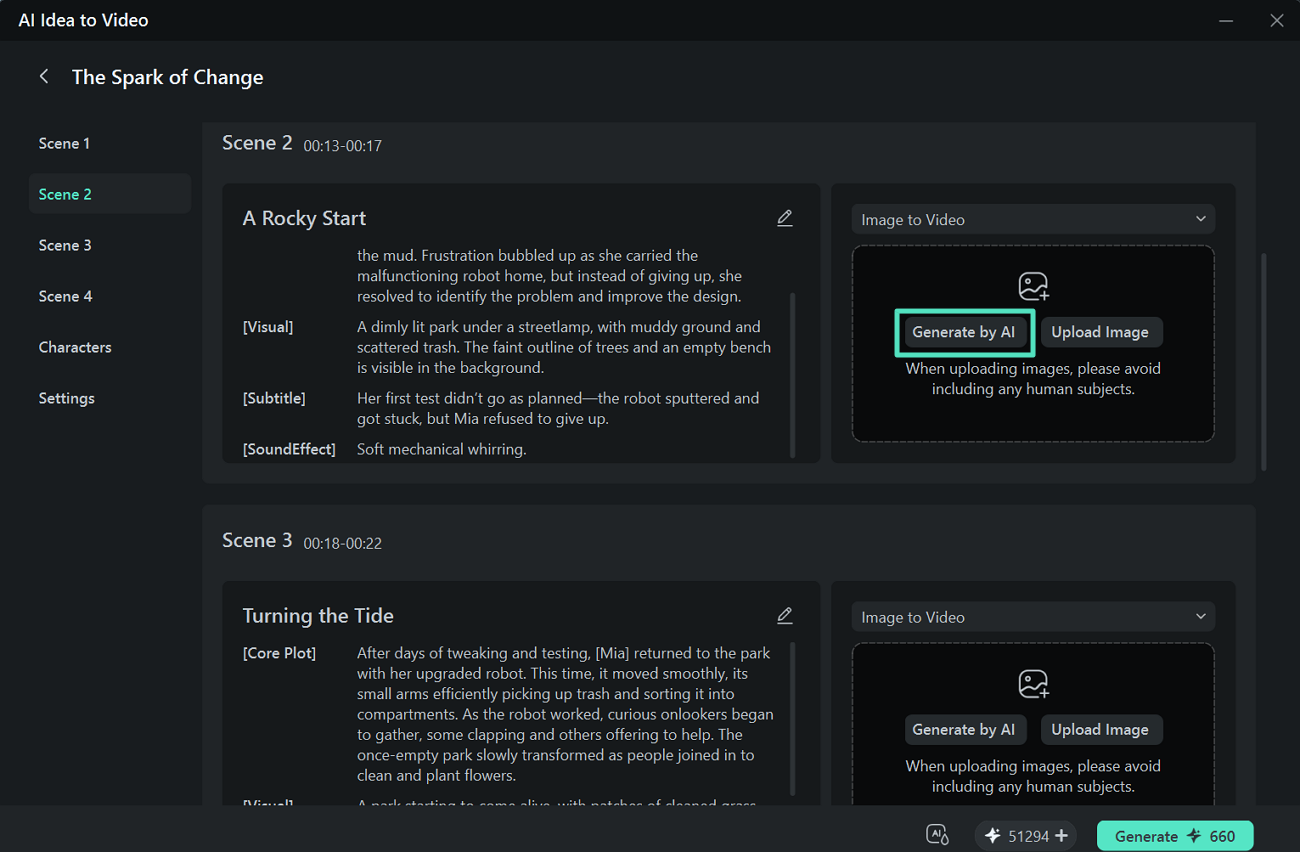
Filmora divides the idea into multiple scenes with core plot, visual, subtitle, and sound-effect details. Read through each scene and edit any section that needs changes. For the visual area of each scene, choose “Generate by AI” or upload your own image
Step 4. Generate Images for All Scenes
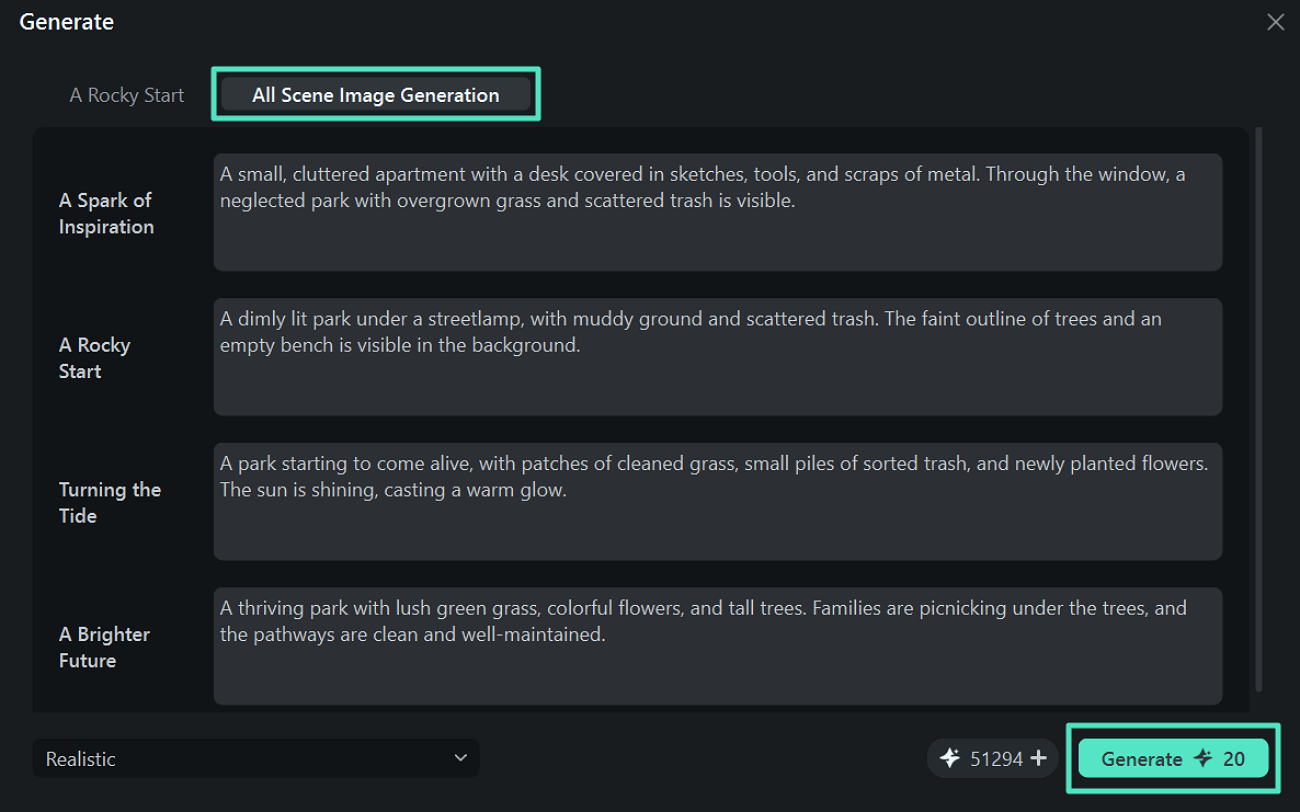
Open “All Scene Image Generation” to create visuals for every storyboard scene at once. Review the scene descriptions, choose the preferred visual style, then select “Generate” to produce image options across the full story.
Step 5. Select and Confirm the Visuals
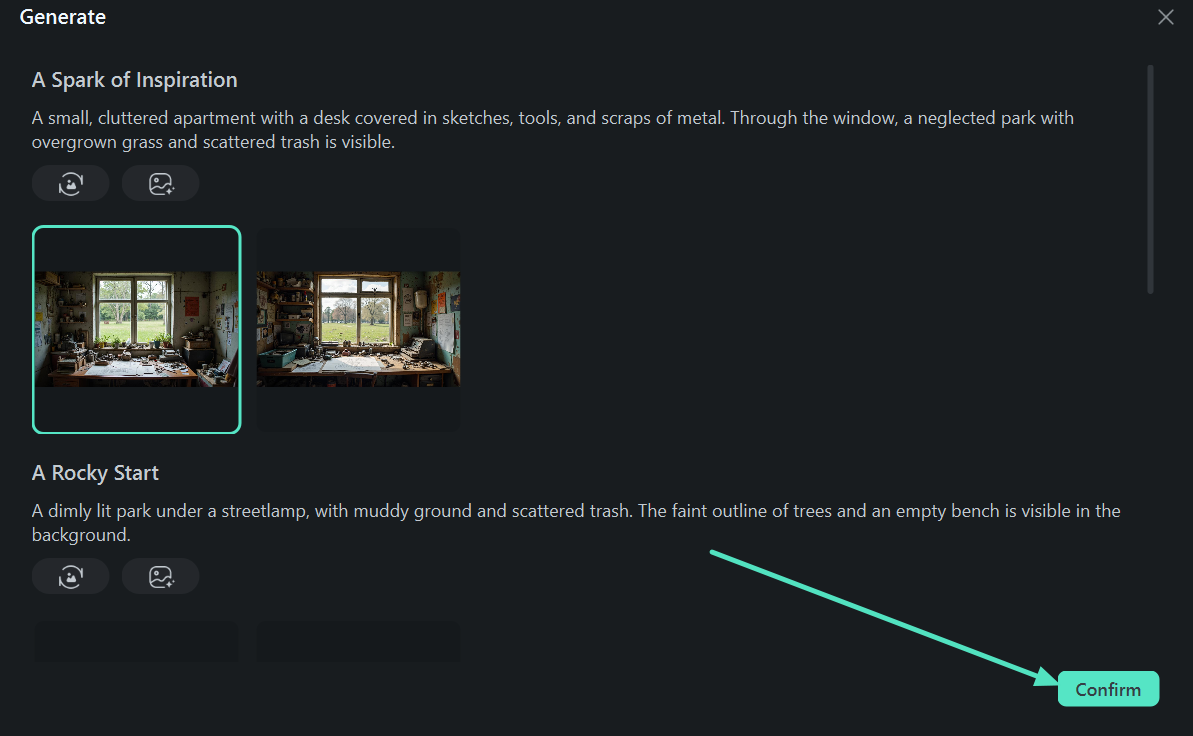
Review the generated image options for each scene, choose the version that best matches the story, and press “Confirm” to apply it.
Step 6. Set Characters and Video Options
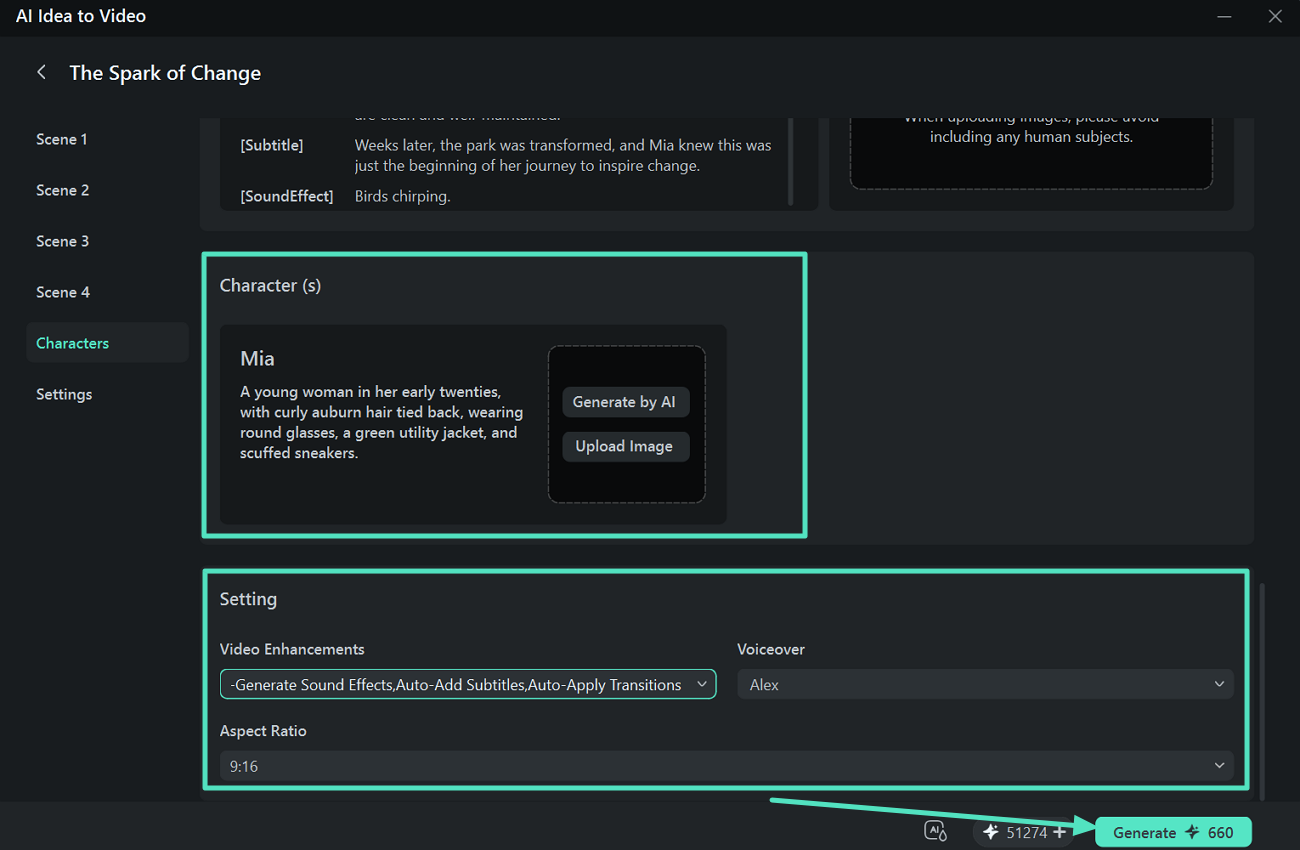
Open “Characters” to generate or upload a character image. Under Settings, choose options such as sound effects, subtitles, transitions, voiceover, and aspect ratio, then click “Generate.”
Step 7. Edit and Export the Story Video
Filmora places the generated scenes in the editing workspace and timeline. Make any final changes to subtitles, clips, audio, transitions, or other elements, then click “Export” to save the finished video.
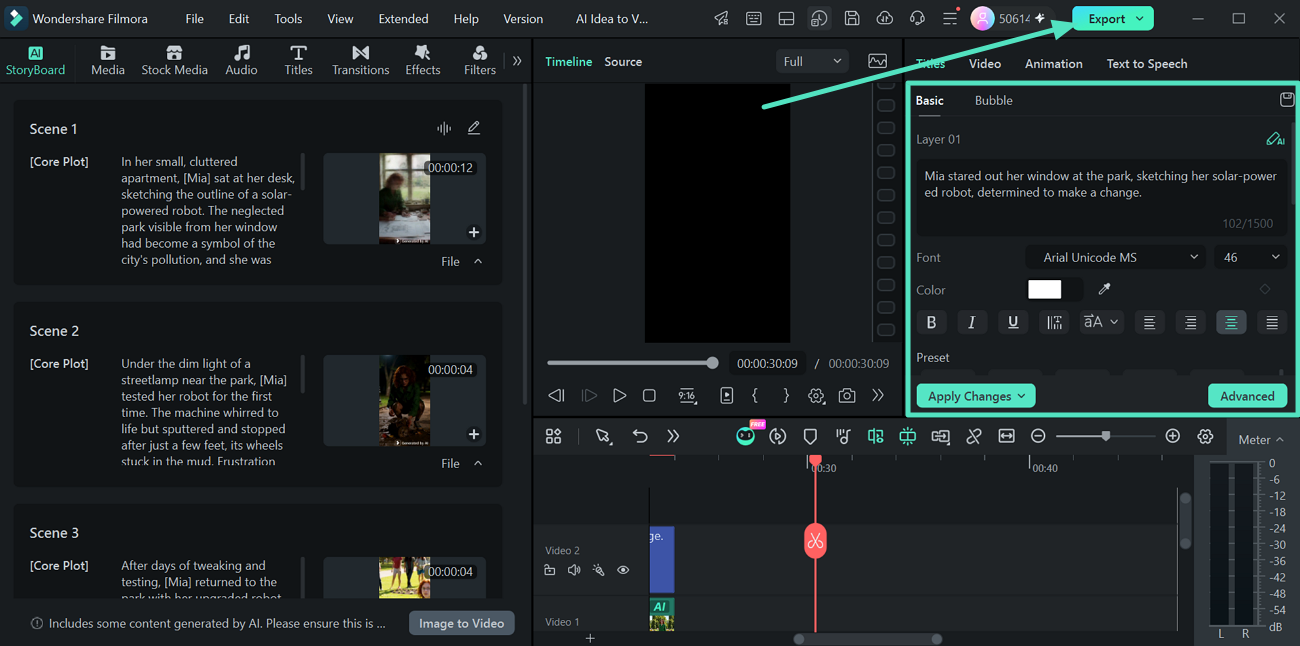
Note: The storyboard is a useful stage for low-cost changes. Once generation begins, fixing a scene can require regenerating that scene rather than only rewriting its description before rendering.
Part 4. How to Write a Strong Starting Prompt and Review the Storyboard
A strong AI idea to video prompt should establish the core idea first, then define the audience and tone so the model understands how the story should be presented. Visual details can follow, but only those that matter to the plot, such as the setting, key character traits, movement, and important objects. Too much detail can make scenes feel crowded.
Once the storyboard appears, the focus shifts from prompting to reviewing. This is where you check whether the story still makes sense before generation starts. Look for repeated ideas, weak transitions, unnecessary scenes, and pacing that does not match the final format. The table below highlights four questions that can help you catch those problems early:
| Question | What to Check |
|---|---|
| Does Every Scene Move the Story Forward? | Remove scenes that simply repeat what the previous scene already established. Cutting filler usually improves the pace more than trying to fix it later. |
| Do the Transitions Between Scenes Make Sense? | Check whether changes in setting, action, or time feel connected. If a jump feels abrupt, add context or adjust the scene order. |
| Does This Suit Where It Will be Watched? | Match the aspect ratio, opening, and scene length to the destination. A vertical social video needs different pacing from a presentation or longer explainer. |
Part 5. How to Refine an AI-Generated Story Video
After generation, AI idea to video results still benefit from manual refinement. Focus on the areas below to improve pacing, clarity, consistency, and overall presentation:
- Regenerate Only The Weakest Scenes: One weak scene can be replaced without disturbing the rest of the sequence. Adjust that scene’s description instead of rewriting the full prompt, since the surrounding scenes may already work well.
- Strengthen The Opening Hook: Generated intros often spend too long establishing context. Trim unnecessary setup and move faster toward the most interesting action, image, or statement so the first few seconds give viewers a reason to continue.
- Review Visuals And Audio Separately: Visuals, voiceover, music, transitions, and text can each have different problems. Watch the video once for the picture and again for sound and timing so small issues do not get missed.
- Use The Editor For Timing And Emphasis: AI can assemble the material, but pacing, emphasis, and shot duration still benefit from manual judgment. A full video editor lets you fine-tune those details before the final export.
Compared with creating every element manually, AI idea to video changes where the time and effort go. The table below shows the main differences in planning, control, revisions, and final editing:
| What You Are Weighing | AI Idea to Video | Building From Scratch |
|---|---|---|
| Planning Speed | A script and a storyboard arrive within minutes. | Hours of writing before any footage exists. |
| Creative Control | The concept is yours and the execution is interpreted. | Every frame reflects a decision you made. |
| Final Human Editing | Still required, and still what decides the quality. | Built into the process from the first cut. |
Conclusion
To conclude, AI idea to video shifts the challenge from assembling every element to deciding what works. Scripts, storyboards, and rough cuts can be generated quickly, leaving more time for review and refinement. Since storyboard decisions shape the final result, careful checking still matters. Filmora makes that process easier by keeping generation and editing in one workflow.
FAQs About AI Idea to Video
1. What is AI idea to video?
It is a workflow that turns a written concept into a finished video through 3 stages. The tool writes a script, breaks that script into a scene-by-scene storyboard, and then generates the footage onto an editable timeline.
2. How should I write a prompt for an AI story video?
State the core idea in the first sentence, then add the audience and the tone in the second. Describe the setting and characters where those details matter, because clearer visual guidance can help the AI shape each scene.
3. Can an AI-generated story video be edited after it is created?
Every scene lands on the timeline as a separate clip instead of one flattened file. Trimming, reordering, swapping media, and adjusting audio all work exactly as they would on footage you shot yourself.
4. Why should I review the storyboard before generating the full video?
Changing a scene description at the storyboard stage costs nothing, while changing it afterward means regenerating the footage. It is also the only point where the whole structure is visible at once.