Description: Still using iTunes to transfer photos from PC to iPhone? Learn to transfer photos from your PC to your iPhone without iTunes in 2023.
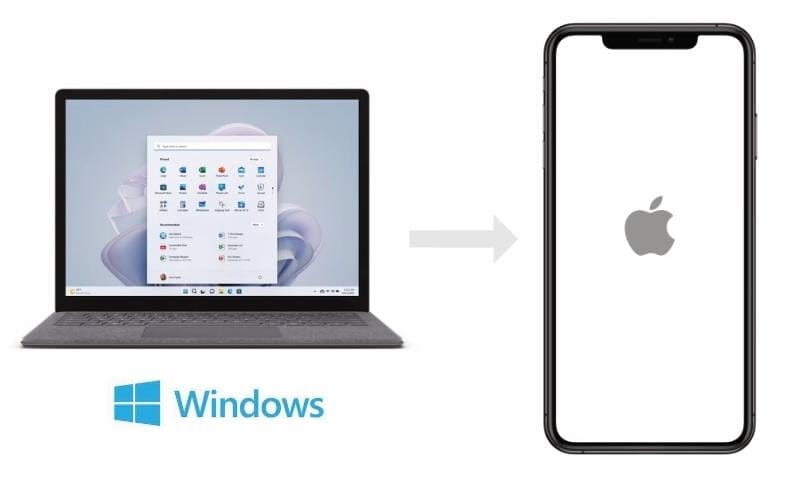
If you just bought a new iPhone and are a PC user, you might be wondering what to do about transferring photos from PC to iPhone. Apple would tell you the only way to do that is to use iTunes, and you might have heard horror stories about iTunes and probably do not want to use it. Is there a way to transfer photos from PC to iPhone without iTunes? Yes, there is, not one but a few!
Part 1: Can I transfer photos from PC to iPhone Without iTunes?
Apple offers iTunes as the official way to transfer photos from PC to iPhone. If you connect your iPhone to your PC and try browsing the contents of the iPhone in File Explorer, you would not be able to see your iPhone contents apart from the free space on the iPhone. This might lead you to think that iTunes is the only way to transfer data to and from Apple devices on PCs, there is a third-party iPhone to Windows file transfer app, you can use to perform all sorts of data transfer to and from your iPhone without iTunes!
Part 2: Tips For Successful Photo Transfer
As with everything, it pays to be prepared and take steps to ensure that the transfer of photos from PC to iPhone goes smoothly without hiccups. If something goes wrong, you will likely start the whole process again because you do not want any corrupt photos or anything of the sort. Here are a few tips to help ensure the process goes as smoothly as possible.
Tip 1: Use A Data Cable In Good Condition
A data cable with frayed ends is all too common. Using such a cable might cause corruption during transfer if the connection is lost due to frayed ends.
Tip 2: Close Resource-intensive Apps Before Transfer
Another tip is to close all resource-intensive apps such as Facebook, games, photo-editing, video-editing apps, etc. This way, memory is freed to transfer photos without bottleneck.
Tip 3: Charge To Full Or Near Full
Data transfer is a power-hungry task. Charge your device to full or near full so your phone does not get charged and become hot during data transfer. It might get warm due to the data transfer task, and you do not want to add to that heat by charging. If the phone overheats, data transfer will stop, and the phone will shut down.
Part 3: Transfer Photos From PC To iPhone Using MobileTrans

MobileTrans by Wondershare allows you to transfer 18 types of data between devices. So, if you want to transfer photos from PC to iPhone without iTunes, Wondershare MobileTrans is your first and best solution.
Download MobileTrans and launch the app.
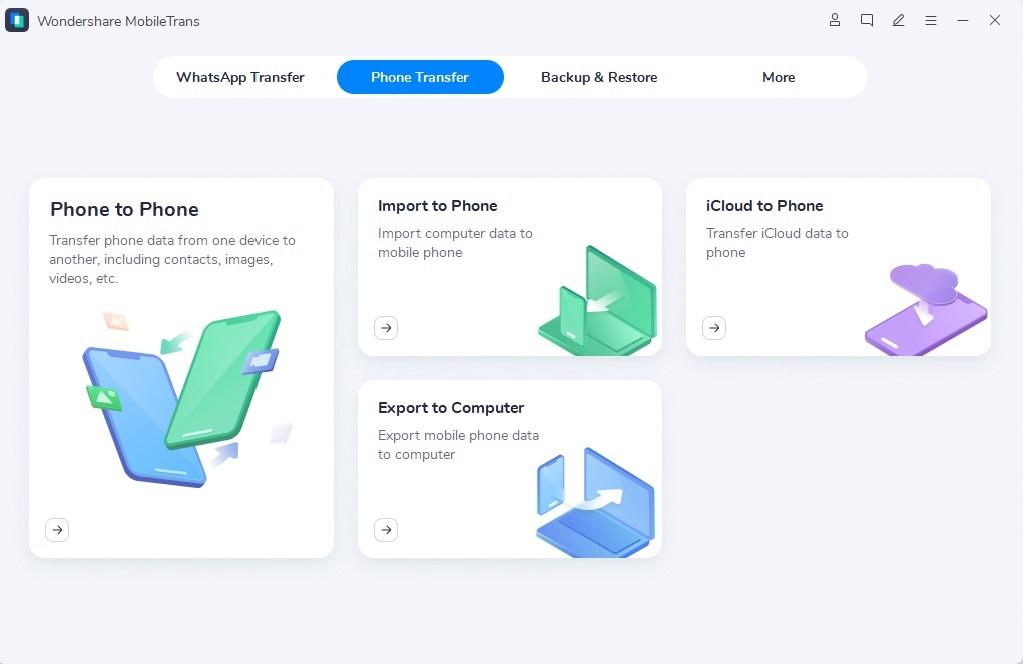
Step 1: In MobileTrans, go to Phone Transfer and click Import to Phone.
Step 2: Connect your phone to the PC and wait for MobileTrans to show all data types it can transfer to your iPhone. Choose photos and select the ones you want to transfer.
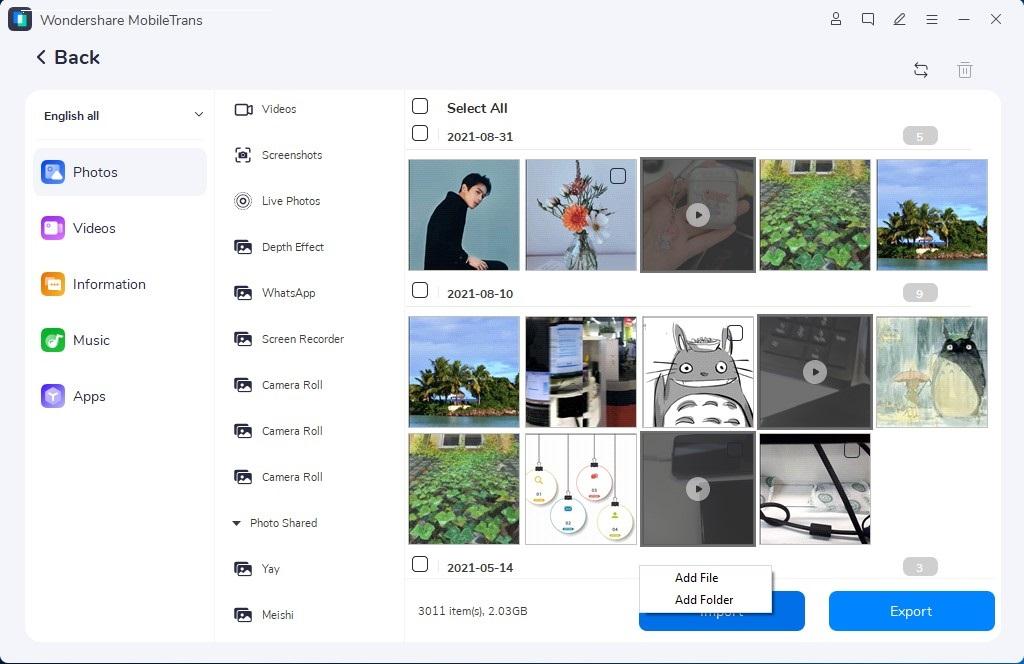
Step 3: Click Import to start the process.
Part 4: Transfer Photos From PC To iPhone Using Dropbox Or OneDrive
But what about if we want to transfer from cloud storage such as OneDrive or Dropbox? We have you covered. Here are steps to do just that for the respective apps.
4.1: Transfer Photos From PC To iPhone Using OneDrive
OneDrive is integrated into Windows OS. How to transfer photos from OneDrive on PC to iPhone? Here is how.
Step 1: Download OneDrive from the iOS App Store.
Step 2: Sign in with the Microsoft account you are signed in with on your Windows PC.
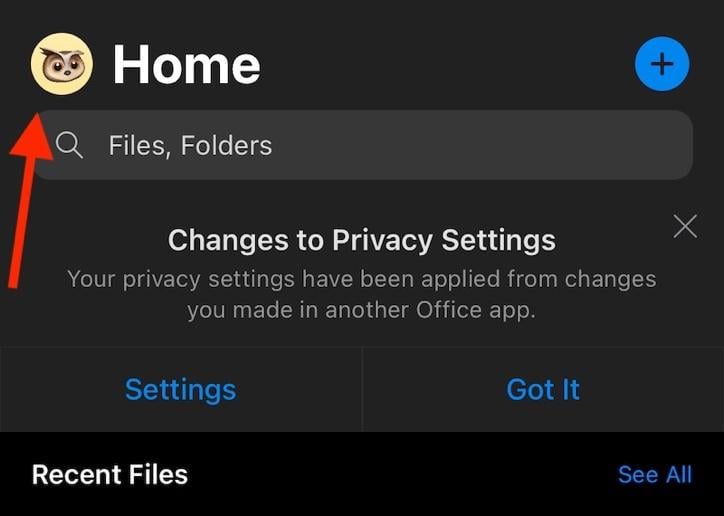
Step 3: Tap your profile image and go to Settings > Camera Upload.
Step 4: Turn Camera Upload ON and make the other choices as necessary.
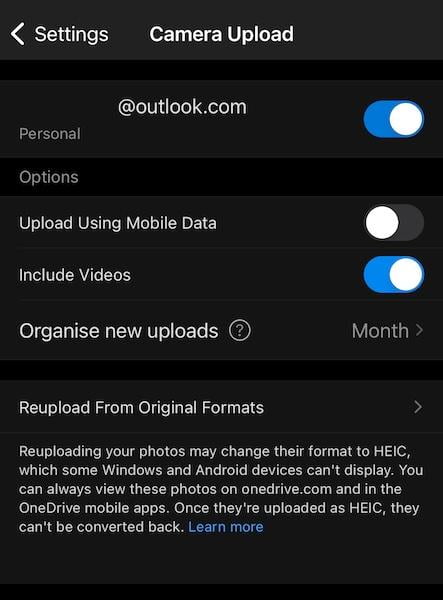
Now your photos on iPhone will be synced to OneDrive, and you will also be able to see photos from OneDrive on PC in OneDrive on iPhone.
4.2: Transfer Photos From PC To iPhone Using Dropbox
Dropbox is a popular cloud storage solution used by millions around the world. Dropbox, when installed on Windows, is integrated into File Explorer, and any file or folder in there will be synced to iPhone if you have Dropbox installed on the iPhone. Here’s how to do that.
This assumes you share a folder in Dropbox on Windows containing photos.
Step 1: Install Dropbox from the App Store on your iPhone.
Step 2: Sign in with the same Dropbox account address as you are on your PC.
Step 3: Tap Accounts and tap Camera Uploads under Features.
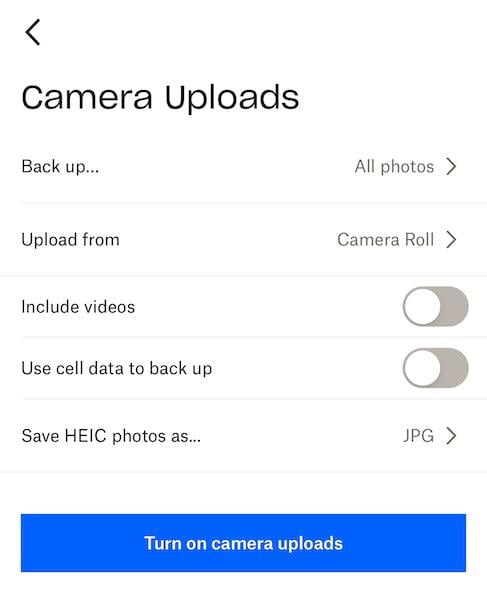
Step 4: If you want to include videos in your uploads, tap Include Videos, and choose if you want to use cellular data to stay in sync. Then, tap Turn On Camera Uploads.
This will allow your iPhone photos to sync to Dropbox and be available on your PC.
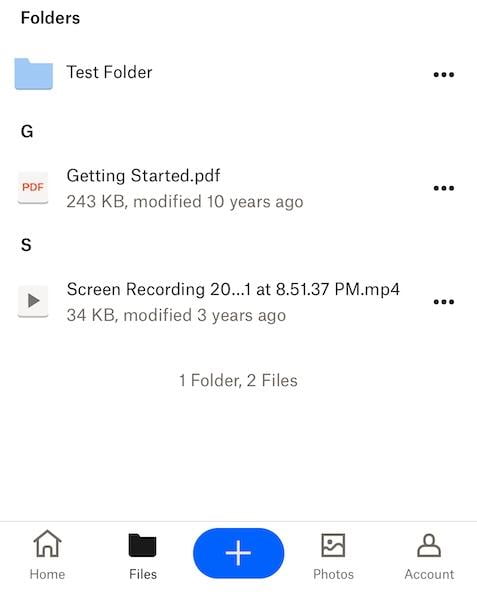
Step 5: To access your photos shared in Dropbox on Windows, tap Files in Dropbox on iOS and access the folder you are storing your photos in.
Part 5: FAQs About PC To iPhone Transfer
Here are commonly asked questions to help you gain more insight into the transfer process.
FAQ 1: What is the difference between transferring and sync?
When you transfer photos from PC to iPhone, you are cloning the database onto your PC, using an app such as MobileTrans. When syncing data, you store data in the cloud and download that data onto your devices.
FAQ 2: Will deleting photos on PC delete them on iPhone after transfer?
No. If you are transferring photos from PC to iPhone, deleting photos on your PC will not delete them on the iPhone. However, if you are transferring from cloud storage services such as OneDrive or Dropbox or Google Photos, deleting any photo on one device will delete it from all devices.
Conclusion
Transferring photos from a PC to iPhone using software such as MobileTrans makes a lot of sense over using cloud storage sync services such as OneDrive and Dropbox when you see that you are essentially creating a copy of your data when using MobileTrans. So, deleting a photo from PC will not delete it on iPhone, unlike cloud storage services wherein if you delete a photo on PC/ iPhone it will get deleted on all devices. But, if you must use cloud storage services, this guide also tells you how to transfer photos from PC to iPhone using OneDrive and Dropbox.

